Clevercast Translate at Home (T@H) can be used to simultaneously translate Zoom meetings and stream them to our player embedded on your own website or on a third-party platform like Swapcard. Viewers are able to choose their preferred language via the embedded player menu.
Since Zoom sends their RTMP broadcasts from servers in the US (even if you are located in Europe or elsewhere), Clevercast lets you use a local ingest hub to avoid issues with an intercontinental broadcast over RTMP. When creating an event, make sure to select ‘Translate@Home RTMP from Streamyard, Zoom… (US East ingest hub)’ as the event’s broadcast protocol.
1. Create an event in Clevercast
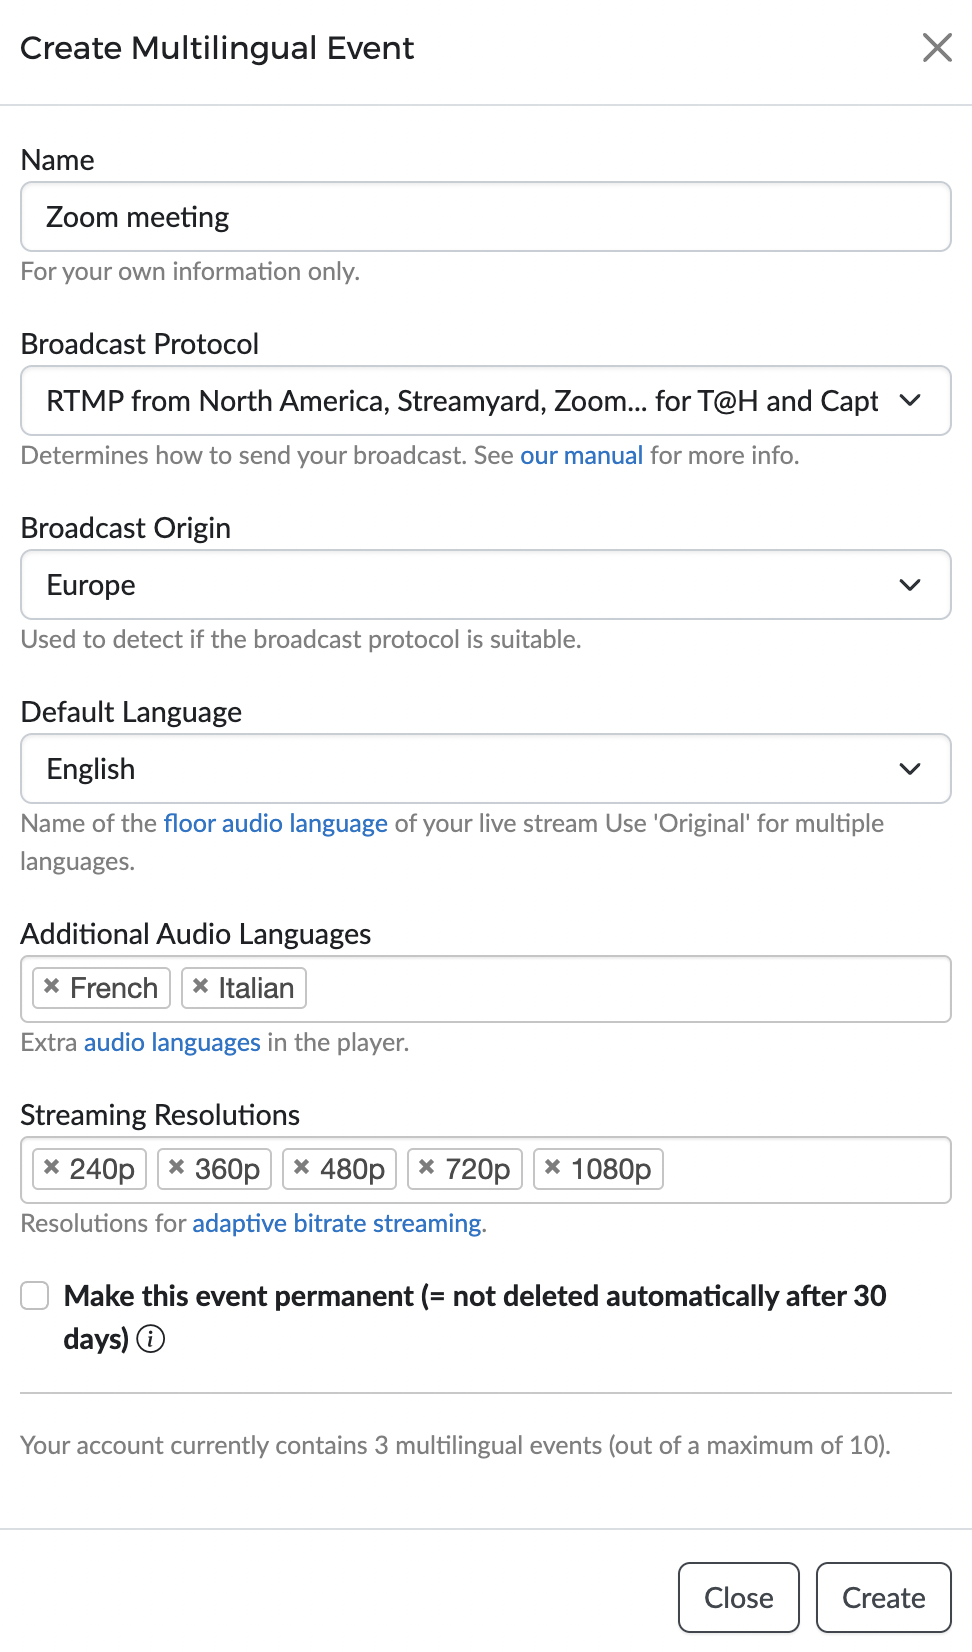
You do this in the same way as for other T@H events. Go to the Live -> Events page and press the ‘Create Multilingual‘ button. Choose the ‘RTMP from North America, Streamyard, Zoom… for T@H and Captions’ broadcast protocol. Also select the default language: this is the language of the Zoom meeting (if multiple languages are spoken, you can choose ‘Original‘ as default language). Add the additional languages and click ‘Create‘.
It is important to test with your interpreters in advance, to make sure every interpreter has a connection and equipment that meets the requirements and observes the best practices for RSI. The quality of the translated audio streams will depend on this. Also make sure that the microphone volume of each interpreter is loud enough.
In the ‘Broadcast‘ tab you will find the RTMP URL and Key for configuring the broadcast from Zoom (see below). See our getting started guide and manual for more info.
2. Configure your Zoom meeting to stream to the T@H event
Zoom allows you to broadcast a meeting using a Custom Service (this requires a Zoom Pro account). First, you must enable this in the settings of your Zoom account.
Once it is enabled for your Zoom account, you can start a broadcast during any meeting or webinar. To do this, the meeting host should click the More button in the Zoom interface (see image below) and choose Live on Custom Live Stream Service.
![]()
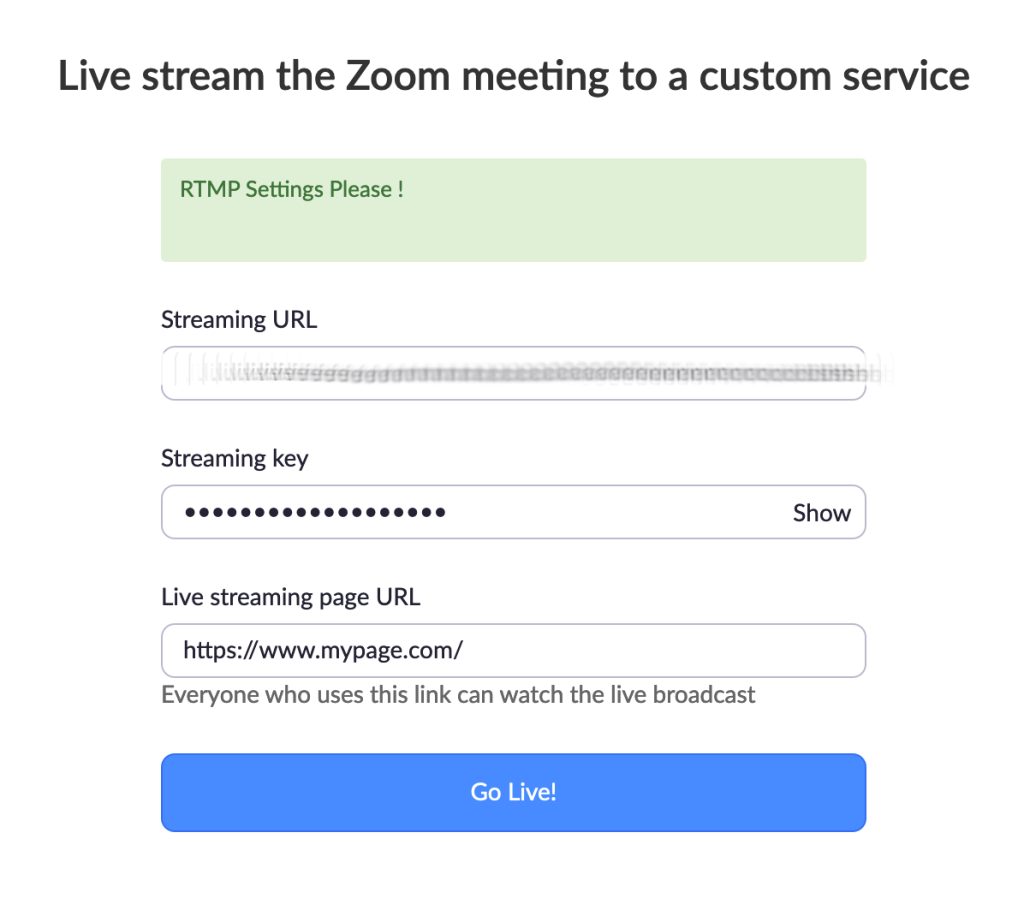
Zoom will then show a dialog for setting up and starting the RTMP broadcast. Copy the Broadcast URL (named ‘Streaming URL’ in Zoom) and Key (named ‘Streaming key’ in Zoom) from the Clevercast event page and paste them in the Zoom dialog. As the ‘Live streaming page URL‘ you can enter the URL of your website or event platform, but this is not important (it serves no other purpose than to let Zoom redirect you to this page). See the image below for correct setup (click to enlarge).
3. Preview and start the event in Clevercast
After Zoom has started broadcasting, set the status of your Clevercast event to preview. This will allow Clevercast to receive the broadcast from Zoom and make the language rooms available to your interpreters. As administrator, you can see the stream in your preview player on the event page, but your viewers won’t see it yet in the embedded player. For more info, see our getting started guide and manual.
When the event is about to start, press the ‘Start Event‘ button. This will ensure that the live stream becomes visible to your viewers in the embedded player. At this point, make sure all interpreters are muted until they are about to start translating. We recommend to press ‘Start Event’ a few minutes before people start speaking in the live stream because of the latency associated with HTTP live streaming (HLS) and because this allows the embedded player to fill its buffer (for smooth streaming). For the same reason, it is best to wait about 2 minutes (at least 30 seconds) after the live stream has finished, before setting the event status in Clevercast to ‘ended‘.
Note: in exceptional cases, the initial broadcast from Zoom may take up to 50 seconds to get through to Clevercast and may not be reliable. On some very exceptional occasions, a corrupted broadcast is initially sent by Zoom, leading to the broadcast not being accepted by Clevercast. If that were to happen, just keep your broadcast running and reset the event in Clevercast to waiting, then reset it to preview.
What if people speak different languages in the Zoom meeting?
When setting up a Translate@Home event, you first select a default language for your live stream. If the floor audio contains different languages, select Original as the default language. This way, anyone who selects the default language knows that they will hear the floor audio.
Next, add all the languages that you want to make available in the video player. For every language, Clevercast creates a language room for your interpreters. Copy the secure link to the language room and send it to the interpreter(s) for the given language.
When you start the live broadcast and the event is set to preview or started, interpreters can connect to the language room. When the floor language is a different language, one of the interpreters should unmute herself and start translating. The floor audio volume may be audible in the background, depending on your background volume setting in the Language Rooms Management page.
When the language in the floor audio and a language room are the same, the interpreters in that language room should mute themselves. If this happens, Clevercast automatically maximizes the floor audio volume for that language (since no translation is being done). Viewers who have selected this language in the player will now hear the floor audio at full volume.
When the floor language changes, one interpreter just has to unmute herself and start translating. Clevercast will reduce the floor audio volume to the selected background volume, so viewers can hear the translation again.
For more info, see our guide for events with different floor languages.