During Remote Simultaneous Interpretation (RSI) it is very important that you ensure that the volume of your microphone is loud enough. Low volume makes your translation difficult to understand and also has a negative impact on the overall audio quality.
Not every microphone has the same base volume. High-quality headsets often have a higher base volume than consumer-grade products (and will result in much better audio quality). In any case, you should start by configuring the volume of your headset’s microphone in the settings of your operating system, while testing with Clevercast Translate at Home (T@H). This requires the event manager to listen to your translation in Clevercast and give you feedback on the volume and quality of your audio.
Make sure to always test before the event starts! Currently, Clevercast T@H directly uses the incoming audio stream without any adjustments. So it is not possible to deliver good audio quality if the incoming volume is too low (see also our best practices).
This page describes how to adjust the volume of your microphone in Microsoft Windows and MacOS (in general). The exact settings will vary depending on the version of your operating system.
Setting the microphone volume in Microsoft Windows
Microsoft has a help page for fixing microphone problems: see the section ‘The microphone volume is too low or does not appear to be working at all’ for a general explanation.
Basically, you should go to the ‘Sound’ or ‘Recording Devices’ settings of Windows, select your microphone and show its properties. See the links below on how to do this for specific Windows versions.
Setting microphone volume for Windows
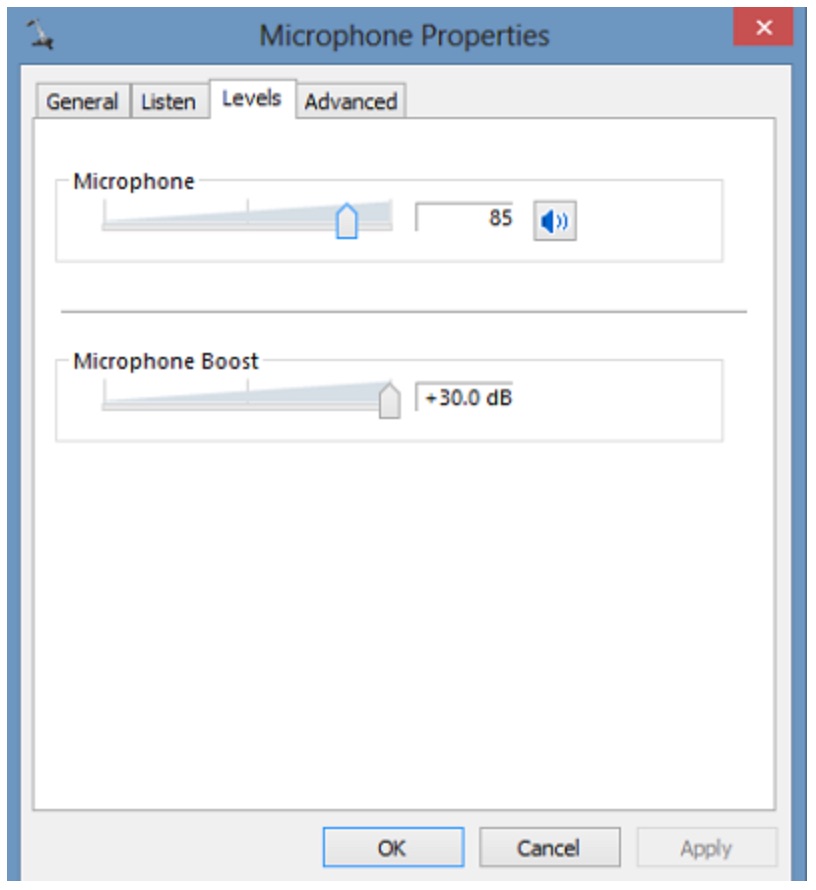
The ‘Microphone’ slider in the ‘Microphone Properties’ dialog allows you to control the output volume. For most headsets, the ‘Microphone’ slider should be set between 75% and 85%.
While you’re adjusting your microphone properties, be sure to keep testing your translation in Clevercast T@H with the help of an event manager. If the event manager doesn’t think the volume is sufficient, you can try to set the Microphone slider higher than 85% or use the Microphone Boost slider.
Note: if you don’t see a Microphone Boost slider, your sound card may not support this feature. If the boost setting doesn’t change your volume, you may have to change an advanced setting of your microphone properties.
Here are detailed explanations for specific versions of Windows:
Setting the microphone volume in Mac OS
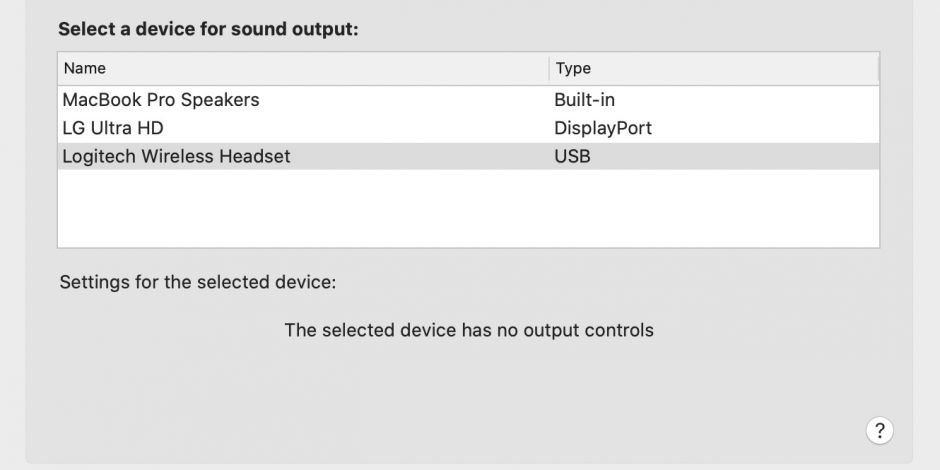
Go to your ‘System Preferences’ and select ‘Sound’. In the ‘Sound’ dialog, go to the ‘Output’ tab and select your headset. Then use the ‘Output volume’ slider to change the volume of your microphone. For most headsets, it should be set at 75% or more..
Setting microphone volume for OSX
While you’re adjusting your microphone properties, be sure to keep testing the translation in Clevercast T@H with the help of an event manager. If the event manager doesn’t think the volume is sufficient, you can try to set slider higher or use settings specific to your headset (if available).