Clevercast now offers a quick and easy way to test whether an interpreter’s internet connection to Clevercast is sufficiently fast and stable. This test can be performed by (potential) interpreters prior to an event. This way you can find out, without wasting anyone’s time, whether or not a particular connection is suitable for remote simultaneous interpretation.
Please note that this test gives a rough indication of the connection at the time of testing. We strongly recommend always performing an auditory test to judge the actual audio quality of each interpreter. Keep in mind that other things such as the computer, headset, location and experience of an interpreter also determine the audio quality.
Overview of T@H connection tests
As a Clevercast administrator, you can see all test results on the ‘T@H Connection Tests’ page (available under the ‘Live’ > ‘T@H Connection Tests’ menu). On this page, you can also copy the link to the test page and send it to your interpreters.

The following metrics are used to determine the quality of the connection:
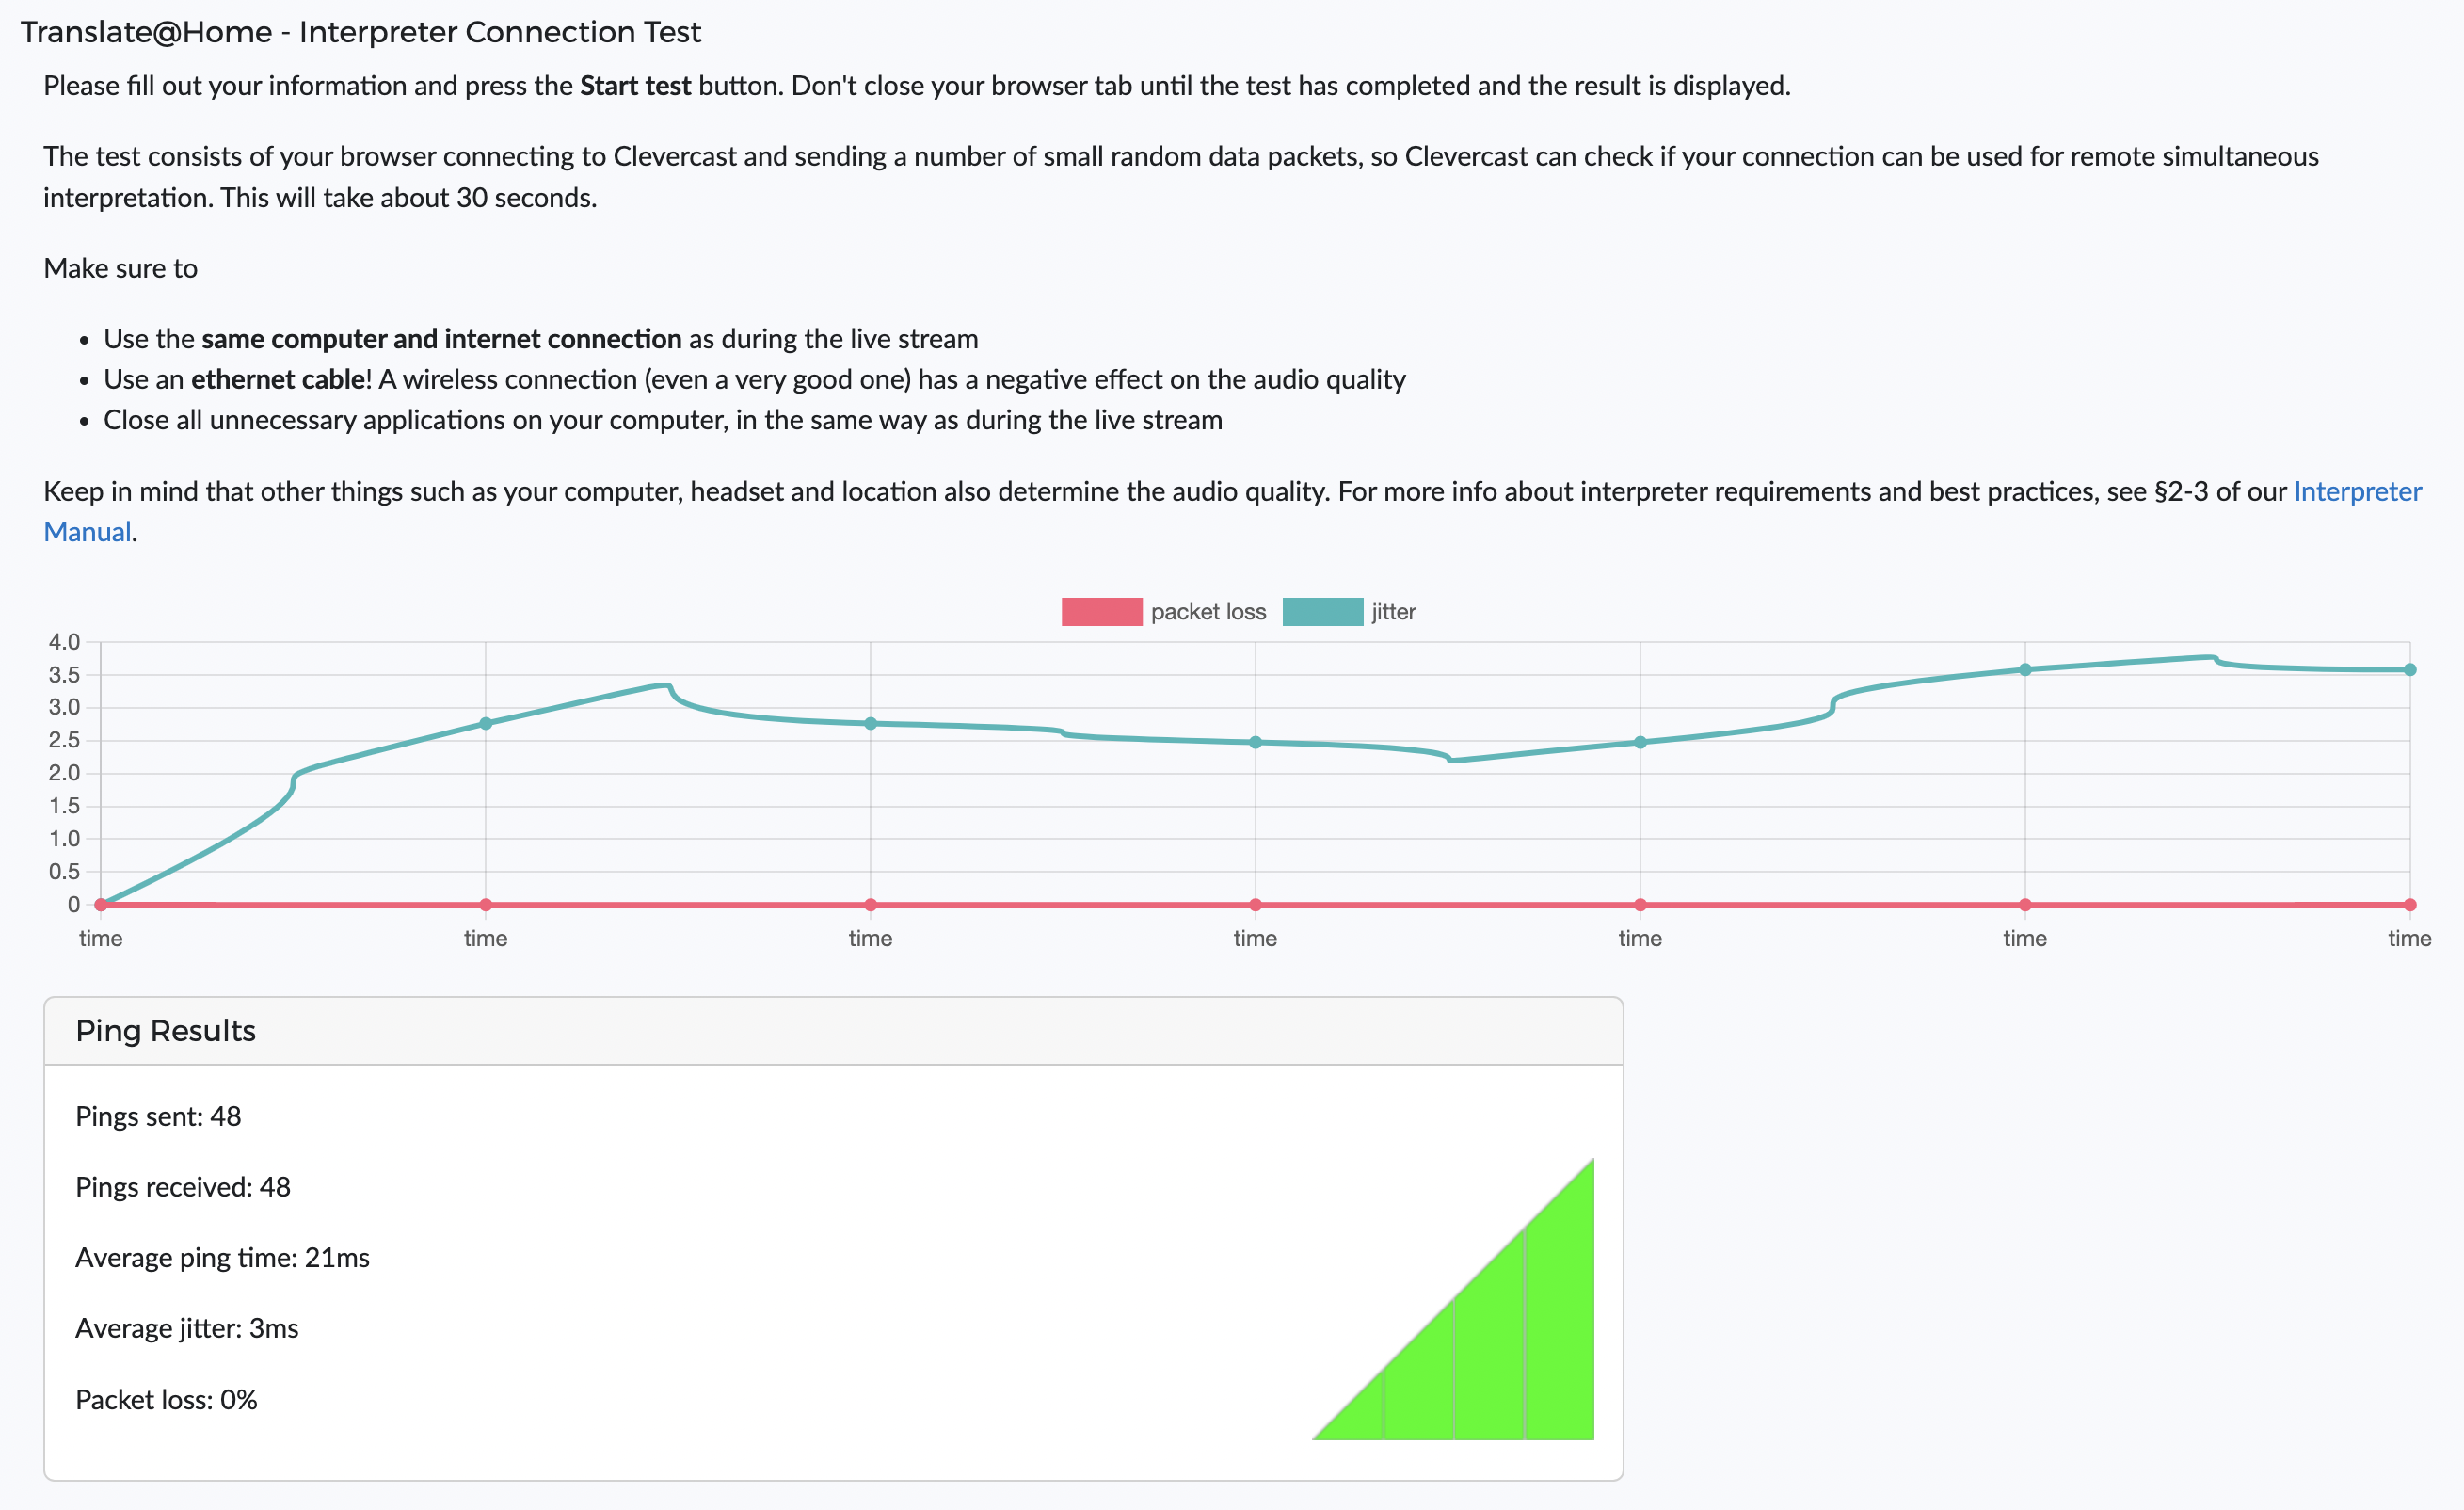
- Average ping time in milliseconds. Ping (or latency) measures the time it takes for a small data set to be transmitted from the interpreter’s computer to Clevercast and back to the interpreter’s computer again. Ideally it should be under 250ms, but a higher value doesn’t necessarily result in poor audio quality. Even a ping time above 750 ms doesn’t have to be a problem in itself, but could lead to other issues like jitter and packet loss.
- Average jitter in milliseconds. Jitter is the amount of variation in packet delay (packets are usually sent at regular intervals and take a set amount of time). The bigger the differences in delay between packet arrivals, the more jitter. This is often caused by network congestion and sometimes route changes. Ideally it should be under 30ms, but a value under 100ms may still be acceptable.
- Percentage of packet loss. A bad connection leads to packets not arriving in time, and thus being lost. The audio codec needs to correct this, leading to lower audio quality. Ideally no packets should be lost, but less than 15% packet loss may still be acceptable (depending on the expected audio quality). If there is packet loss, the audio codec needs to make corrections, leading to lower audio quality.
Taking the test
To let your (potential) interpreters take the test, provide them with the link to the test page (which you can copy on the overview page).
Doing the test is simple. Interpreters just have to paste the test link in the address bar of their Firefox browser, enter their name, email and location (city) and press the Start button. The browser will establish a connection with Clevercast and start sending data packets. After 30 seconds, the result is available.
Before doing the test, interpreters should make sure to:
- Use the same computer and internet connection as during the live stream
- Use an ethernet cable (no wireless connection!)
- Close all unnecessary applications on the computer, in the same way as during the live stream
We strongly recommend letting all your interpreters take the test in advance. This allows you to exclude internet connections that are not fast or stable enough. In some circumstances, a bad result may be due to temporary network congestion. To rule this out, an interpreter could do a new test at a different time. However, if this happens regularly, it is probably better to look for a different connection.
For more info, see §1 of our Testing and Troubleshooting manual.