
Clevercast Translate@Home now supports bilingual language rooms. This allows interpreters to translate the floor audio into two languages in turn, without having to connect to different language rooms.
This can be used, for example, for an event with a mixed floor. When the language in the floor audio changes, the interpreters can continue to translate inside the same room. They only have to press the button of the respective language to switch languages.
Creating a bilingual language room
A bilingual language room is created when an event manager adds a second language to an already existing language room. For a language to be selected as second language, it must also have its own language room for the same event. The default language will usually be ‘Original‘.
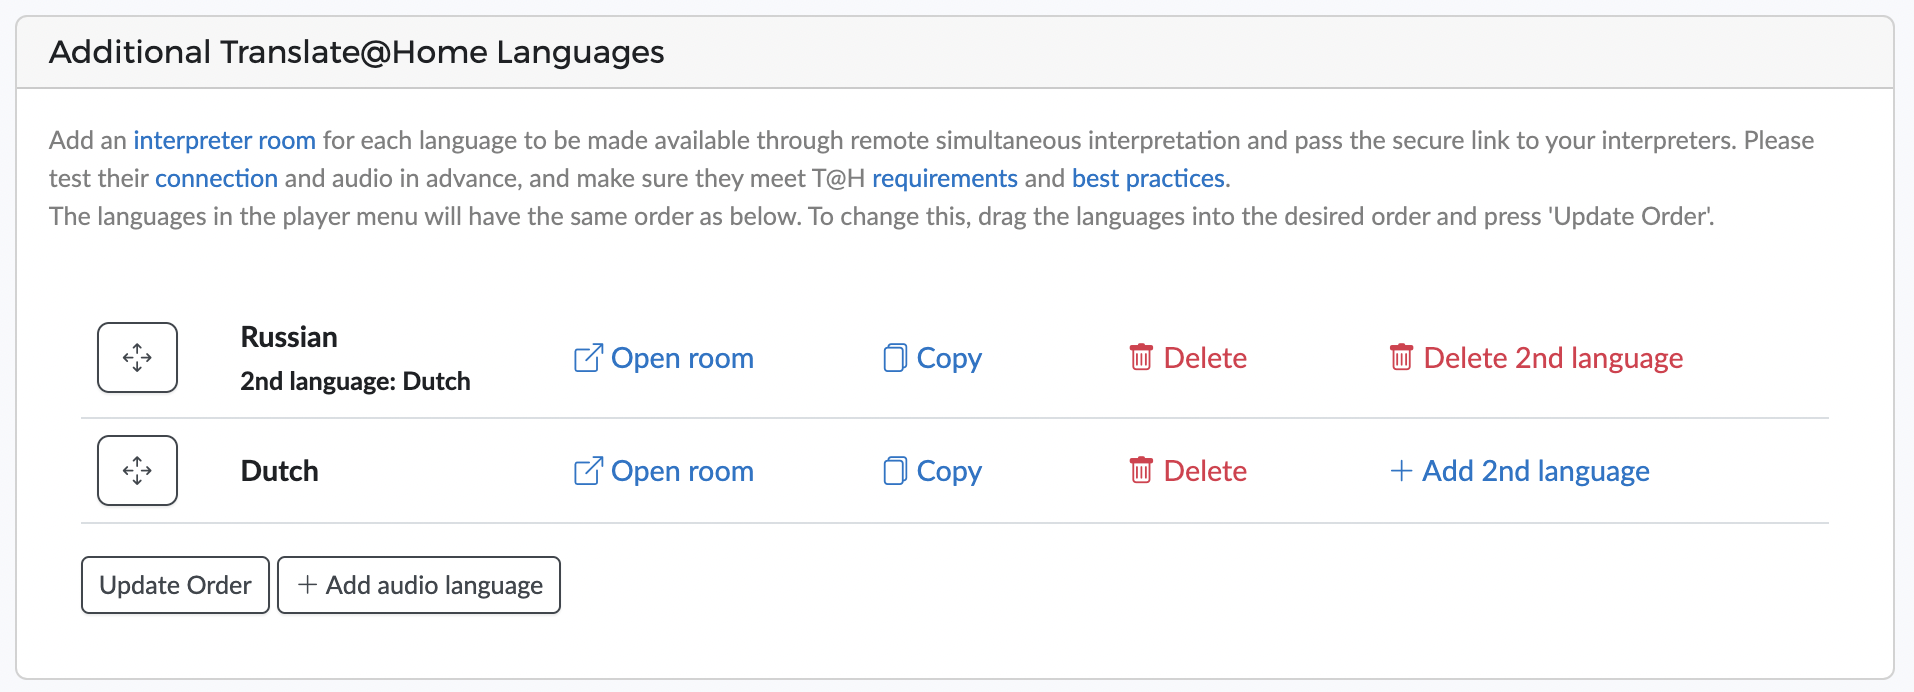
In this example, a language room is created for each of the two languages. ‘Dutch‘ is set as the second language in the language room for translation into ‘Russian‘. So a bilingual interpreter can use the bilingual room to translate speakers into both languages.
Using a bilingual language room
In a bilingual language room, the interpreter can change the translation language. In the example below, the interpreter can switch between the languages ‘Russian‘ and ‘Dutch‘ by toggling the language selection button (below the microphone and mute/unmute button).
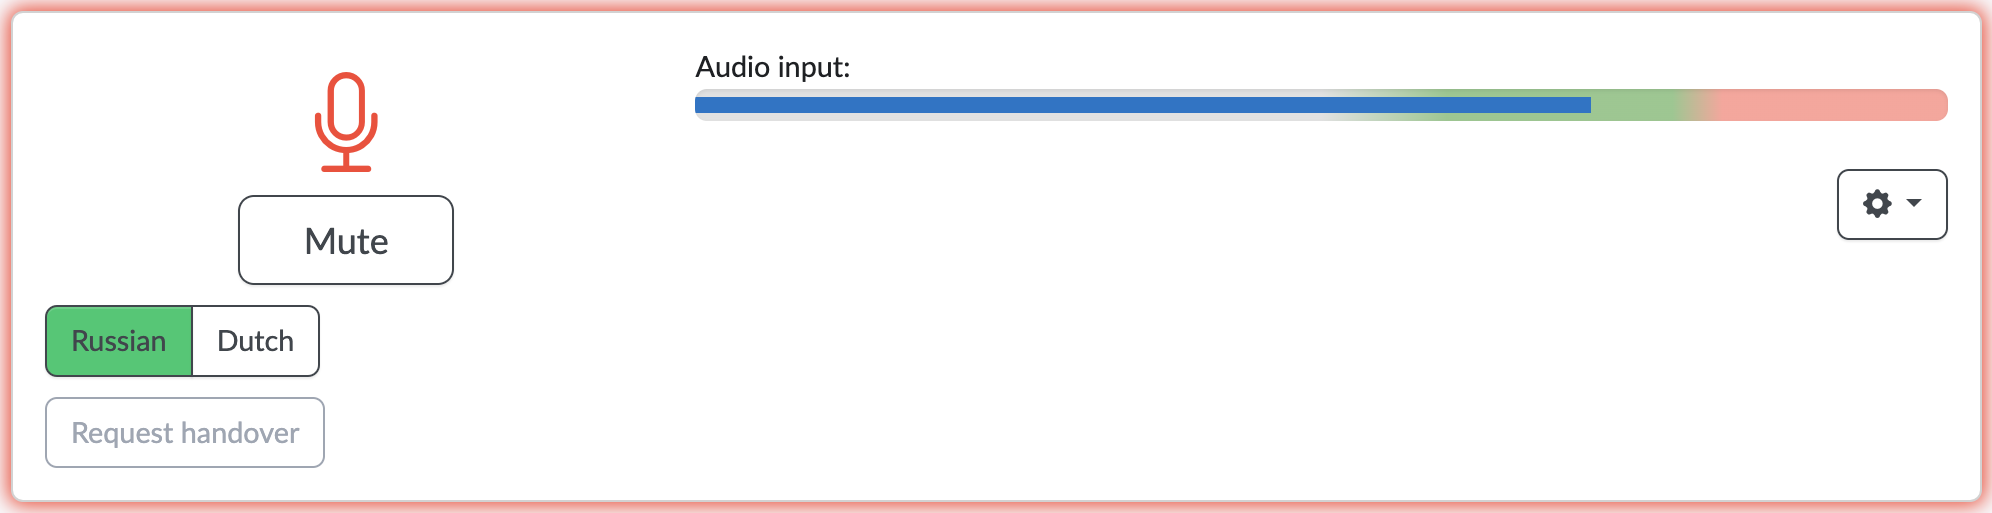
When the button is pressed, the selected language is active using a green colour (in this example ‘Russian‘). When the interpreter is not muted, the translation is automatically sent to the selected language. If no other interpreters are active, the floor audio automatically gets turned up to full volume for the other language. This way, a single interpreter can translate a bilingual event in real time.
This new feature is based on feedback from our customers. So if you have tips or feature requests, don’t hesitate to send them.